
















Installation, upgrade and uninstall
Saved Basket installs like any PrestaShop module, from the Module Manager. Installing it adds the storefront block, the settings page and the three small database tables; everything is removed again when you uninstall.
Install the module
- Open Modules › Module Manager.
- Click Upload a module and choose the
savedbasket.zipfile, or find Saved Basket if it is already in your list. - Wait for the green confirmation. The module is installed and its block is live on the cart straight away.
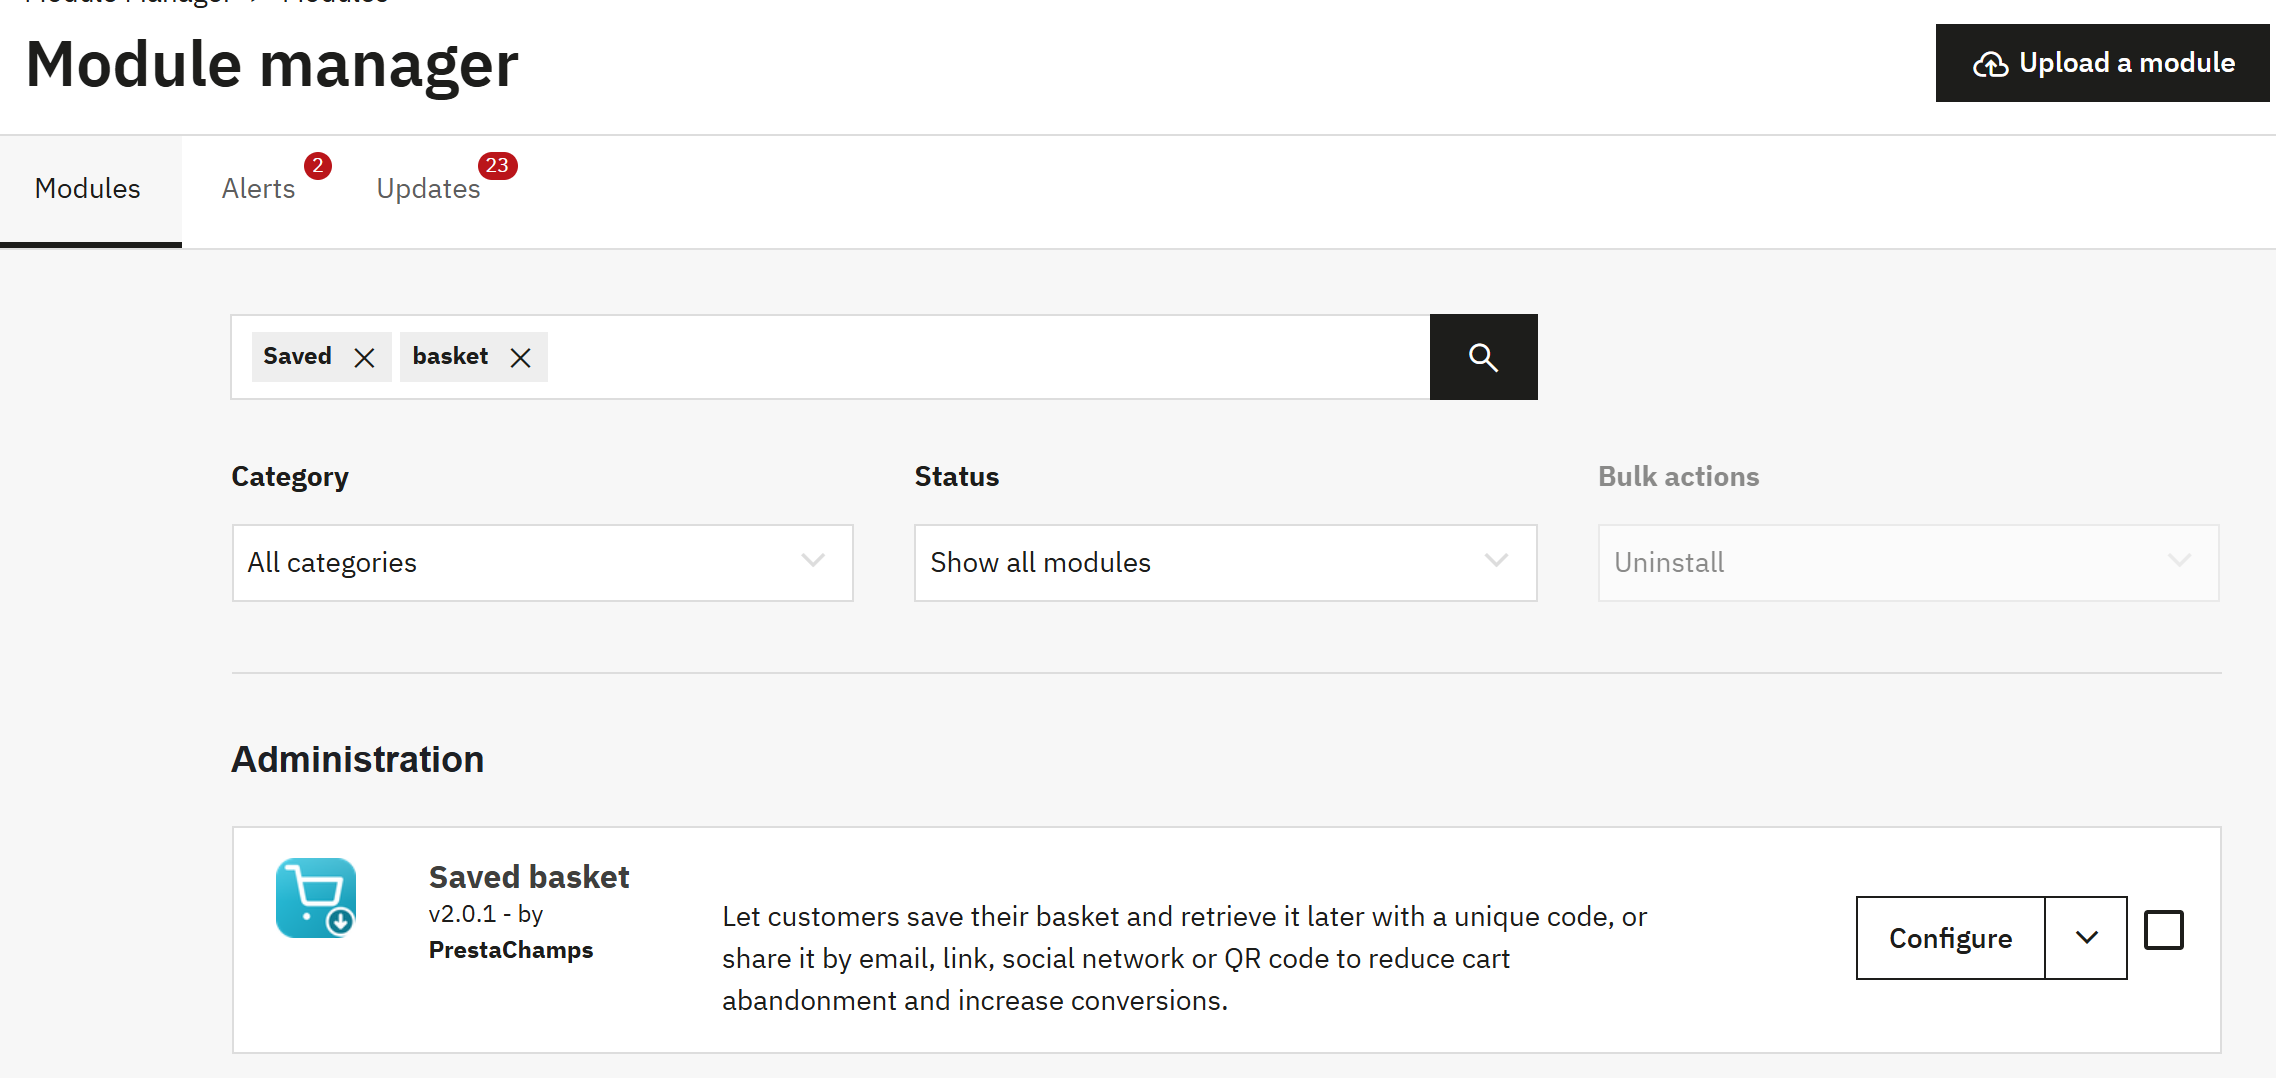
- Configure opens the settings page, the dashboard-first screen this guide describes.
- The action menu holds Disable, Reset and Uninstall for the module.
Open the settings
Click Configure on the module's card. The settings open on the Dashboard, with the coloured menu on the left. Every screen in this guide is reached from that menu (The back-office dashboard).
The Module Manager actions
| Action | What it does to your data |
|---|---|
| Configure | Opens the settings. Changes nothing on its own. |
| Disable | Hides the block and stops the scheduled cleanup, but keeps every saved basket and every setting. Enable brings it all back. |
| Reset | Re-runs the install step. Settings and saved baskets are kept. |
| Uninstall | Removes the block, the settings and the three database tables, so the saved baskets are deleted. Export the statistics first if you want to keep them (Export to CSV). |
Upgrade to a new version
To move to a newer version, upload the new savedbasket.zip in the Module Manager (or use Upgrade when PrestaShop offers it). Your settings and your saved baskets are kept. After an upgrade, open the settings once so the dashboard figures refresh.
Uninstall cleanly
Open the module's action menu and choose Uninstall. The storefront block disappears, the settings page and the hidden menu entry are removed, and the module's three tables are dropped. Your theme, your products and your orders are untouched.
Quick start: live in 5 minutes
Saved Basket works the moment it is installed. These five steps confirm the block is on your cart, show you the save-and-share popup, and point you to the settings you are most likely to change.
Step 1: open the dashboard
- Open Modules › Module Manager, find Saved Basket and click Configure.
- The settings open on the Dashboard. The status line at the top shows the module is Active, where the block is placed and the expiration setting.
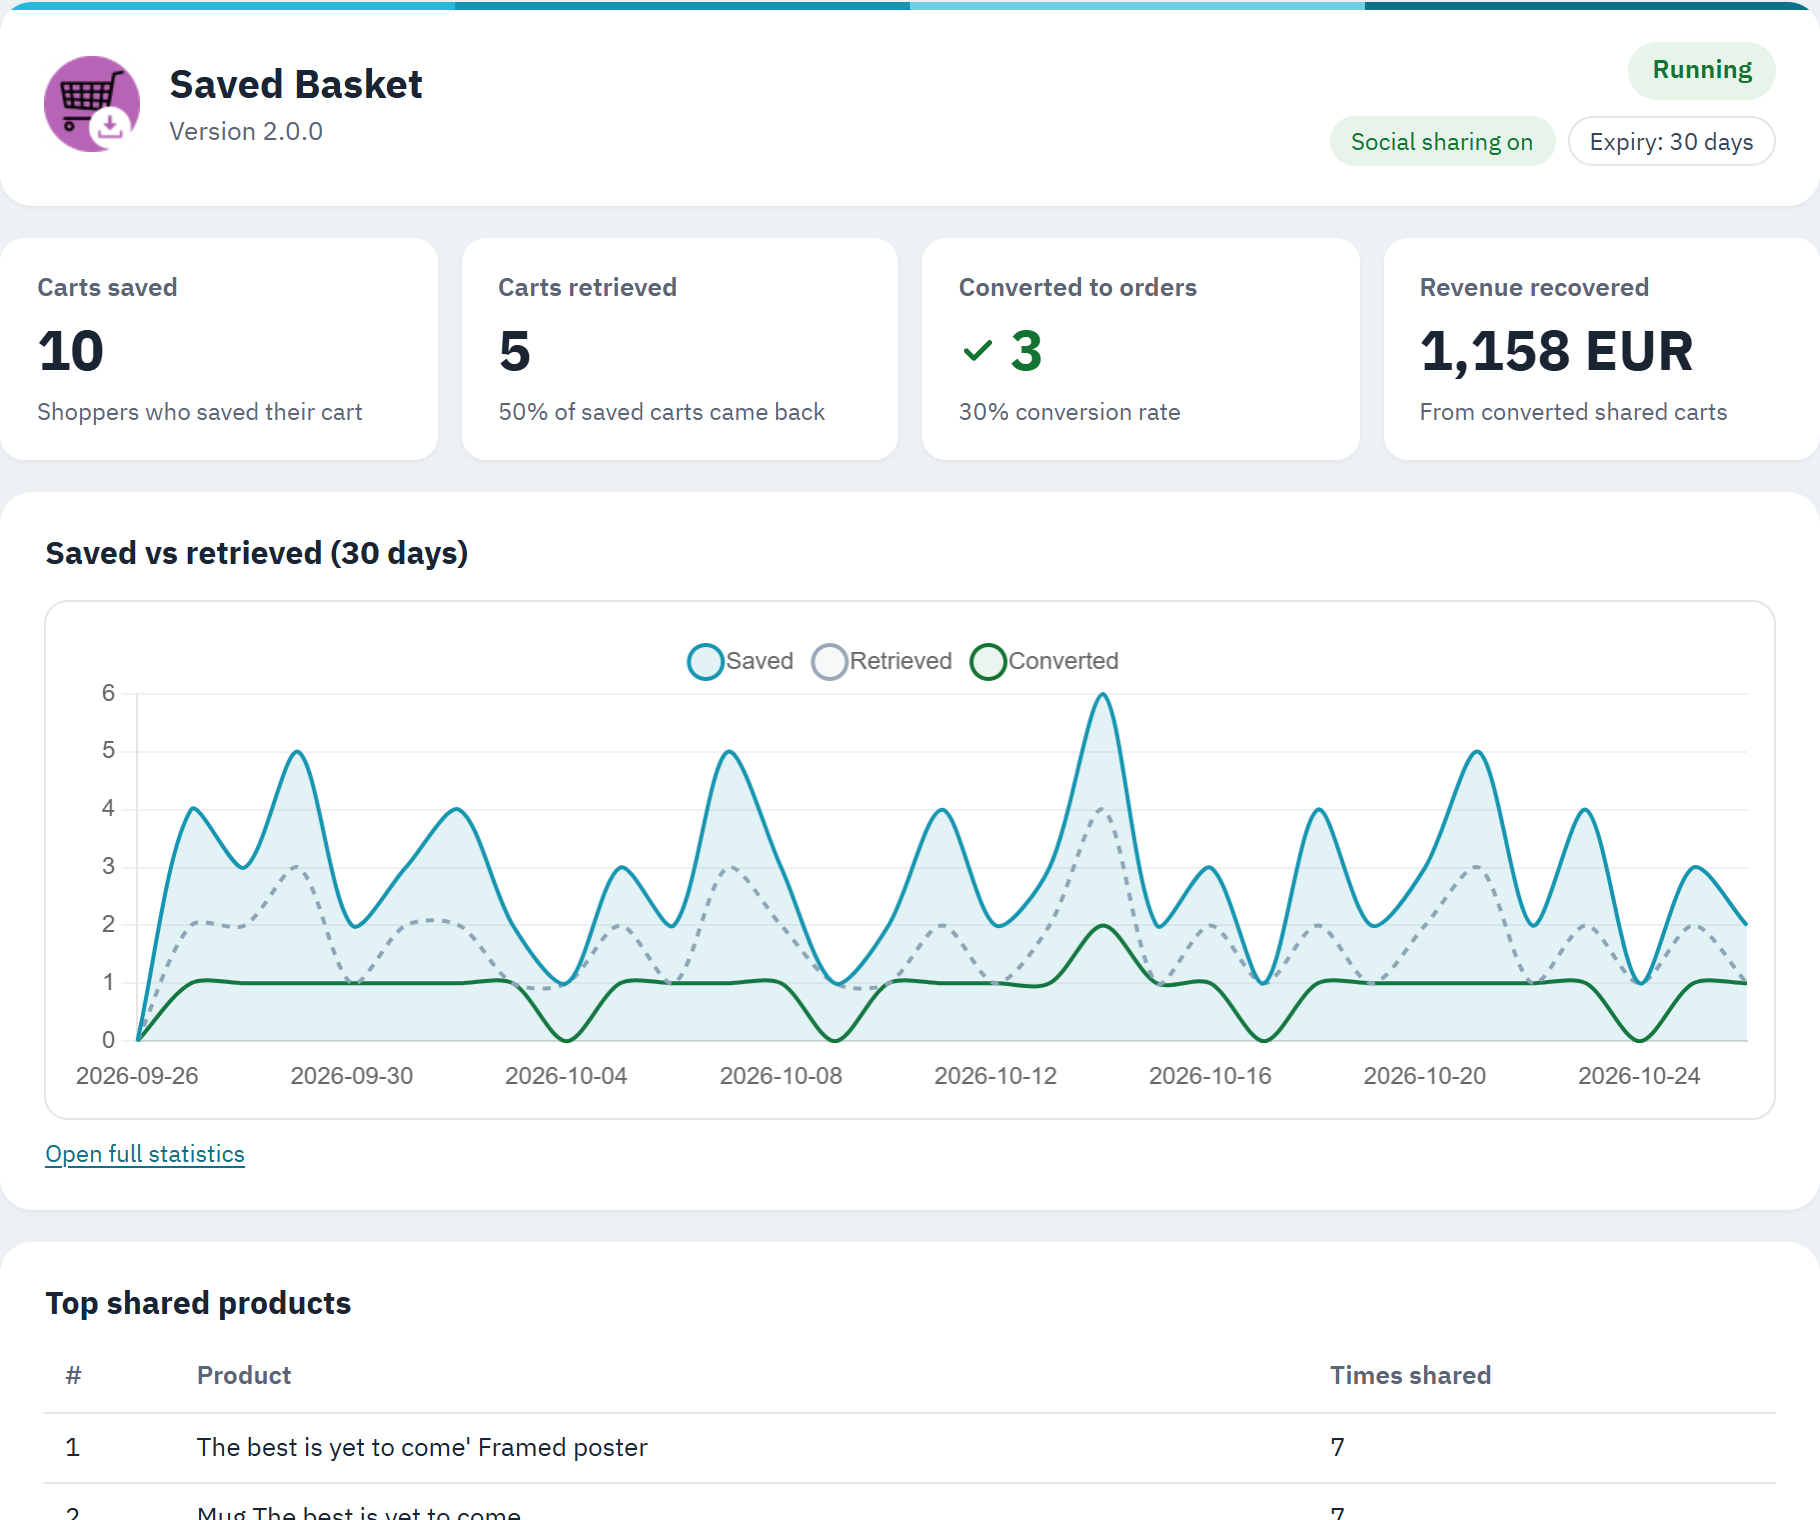
- The module's name, logo and version.
- The running state and the feature chips (social sharing, expiry).
- The key-figure tiles: carts saved, retrieved, converted and the revenue recovered. Each tile opens Statistics.
- The saved-vs-retrieved chart for the last 30 days.
Step 2: check the block on your cart
Add a product to a basket in your shop and open the cart page. You should see the Save Basket and Retrieve Basket buttons. In the Classic and Hummingbird themes they appear in the reassurance block, below the checkout button. If you want them somewhere else, change Show the block in under General (Placement on the cart).
Step 3: save a basket
- On the cart page, click Save Basket.
- The popup shows your basket, a basket code and an email field.
- Enter an email address and click Send. The basket is saved and emailed, and the share buttons appear.
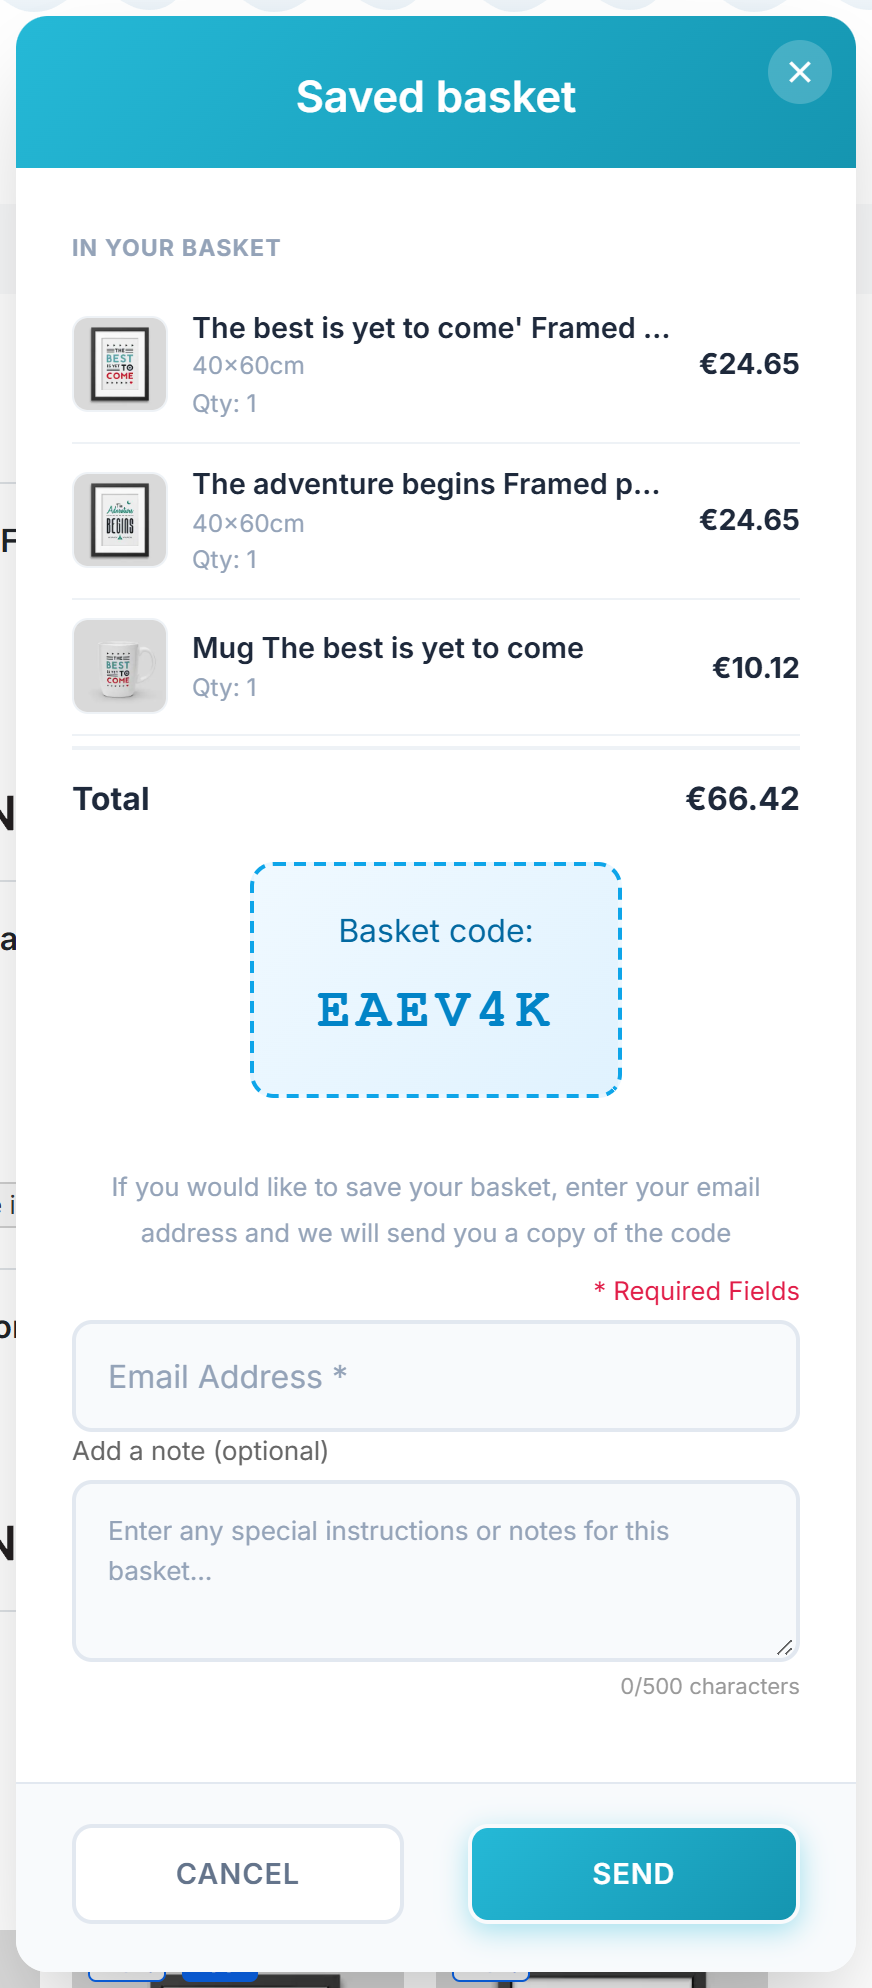
- A preview of the basket being saved: each product, its quantity and price, and the total.
- The basket code the shopper can type back in later.
- The email field: enter an address to receive the basket by email.
- Send saves the basket, emails it and reveals the share buttons.
Step 4: look at the share options
After Send, the popup shows the share buttons: WhatsApp, Facebook, X, email, Messenger, LinkedIn, Pinterest and a copy-link button. The networks on offer are set under Features (Social sharing).
Step 5: decide how long baskets live
By default, saved baskets never expire. If you would rather clear out old baskets automatically, turn on Enable cart expiration under Cart expiration and set up the daily cleanup job (Cart expiration and the cleanup job). You can also email a reminder shortly before a basket is lost. That is everything the module needs to run; the rest of this guide explains each screen in detail.